Building a Todo app with React.js (4) - Multiple Todos

The next step will be the ability to add multiple todos. For example we might have a list that is used only for grocey lists, the other might be a list of planned blog posts or a list of the things to do todays. That’s why it’s important to have ability to sort the todos in different lists.
- TODO CATELOG FORM
- TODO CATELOG
Component 1 - ToDo Catelog Form
It contains a text field followed by a button to trigger the addition of catelog in the Todo list.
var ToDoCatalogForm = React.createClass({
    getInitialState: function() {
        return {item: ''};
    },
    handleSubmit: function(e){
        e.preventDefault();
        this.props.onFormSubmit(this.state.item);
        this.setState({item: ''});
        ReactDOM.findDOMNode(this.refs.item).focus();
        return;
    },
    onChange: function(e){
        this.setState({
          item: e.target.value
        });
    },
    render: function(){
        return (
            <div className="row">
              <form  onSubmit={this.handleSubmit}>
                <div className="form-group ">
                    <input type='text' className="newTodoCatalogField form-control"  ref='item' onChange={this.onChange} value={this.state.item}/>
                    <input type='submit' className="btn btn-default" style={{"float":"left","marginLeft":"5px"}} value='Add'/>
                </div>
              </form>
              </div>

        );
    }
});
Component 2 - ToDo Catelog
It will show all todos list.
selectedID is the variable which will store the current todos being shown. The todos-list will update according to selectedID.
var ToDoCatelog  = React.createClass({
    changeTodo : function(e){
        this.props.onSelected( e.currentTarget.dataset.id);
    },
    checkActive:function(i){
        if (i == this.props.selectedID)
        {
            return "list-group-item active";
        }
        else
        {
            return "list-group-item ";
        }
    },
    render: function(){
        var selectedID = this .props.selectedID;
        var allitems =this.props.Todos;

        return <div className="list-group">
        {
            allitems.map(function(item,i){
            var _class = "";
            if (i == this.props.selectedID)
            {
                _class =  "list-group-item active";
            }
            else
            {
                _class =  "list-group-item ";
            }
            return(
                 <a href="#" key={i} data-id={i} className={_class} onClick={this.changeTodo} ><span className="badge" >{item.items.length}</span>{item.name}</a>
            )
        },this)}</div>;
    }
});
Component 3 - ToDoApp
We will redeclare the return value of getInitialState function.
getInitialState : function(){
        return {Todo:[{name:"parimary",items:[{item:'Todo itmd #1',isDone:false},{item:'Todo itmd #2',isDone:true},{item:'aaaa',isDone:true},{item:'dddd',isDone:true}
        ]},{name:"Secondary",items:[{item:'Todo itmd #1',isDone:false},{item:'Todo itmd #2',isDone:true},{item:'Todo itmd #3',isDone:true}
        ]}],filter:[{keyword:'',Status:"SHOW_ALL"}],selectedCatelog:"0"};
},
We create AddCatelog function and setSelectedCatalog function.
// Here is the Add Catelog function
AddCatelog: function(newCatalog){
    var Catalog = {name:newCatalog,items:[{item:'Todo itmd #1',isDone:false}]};
    var newtodo = this.state.Todo.concat([Catalog]);
    this.setState({
        Todo: newtodo
    });
},
setSelectedCatalog: function(index){
    this.state.selectedCatelog = index;
    this.setState({
        selectedCatelog: index
    });
},
In the meantime, we also need to modify updateItems function and deleteItem function. Updating Item or Deleting Item based on the selectedCatelog.
updateItems: function(newItem){
        var item = {item:newItem,isDone:false};
        var newtodo = this.state.Todo;
        var allItems = this.state.Todo[this.state.selectedCatelog].items.concat([item]);
        newtodo[this.state.selectedCatelog].items = allItems;
        this.setState({
            Todo: newtodo
        });
    },
deleteItem : function(index){
        var newtodo = this.state.Todo;
        var allItems = this.state.Todo[this.state.selectedCatelog].items.slice(); //copy array
        allItems.splice(index, 1); //remove element
        newtodo[this.state.selectedCatelog].items = allItems;
        this.setState({
            Todo: newtodo
        });
},
At last, We insert ToDoCatalogForm Component and ToDoCatelog Component into render function and pass items based on selectedCatelog.
render: function(){
    return (
        <div className="row">
            <div className="col-xs-3">
                <ToDoCatalogForm onFormSubmit = {this.AddCatelog} />
                <ToDoCatelog selectedID = {this.state.selectedCatelog} onSelected={this.setSelectedCatalog} Todos = {this.state.Todo} />
            </div>
            <div className="col-xs-6">
                <ToDoBanner/>
                <ToDoFilter onFilter = {this.filterItem} onSearch = {this.searchItem} filter={this.state.filter}/>
                <ToDoForm onFormSubmit = {this.updateItems} />
                <ToDoList  items = {this.state.Todo[this.state.selectedCatelog].items} filter = {this.state.filter} onDelete={this.deleteItem}/>
            </div>
        </div>
    );
}
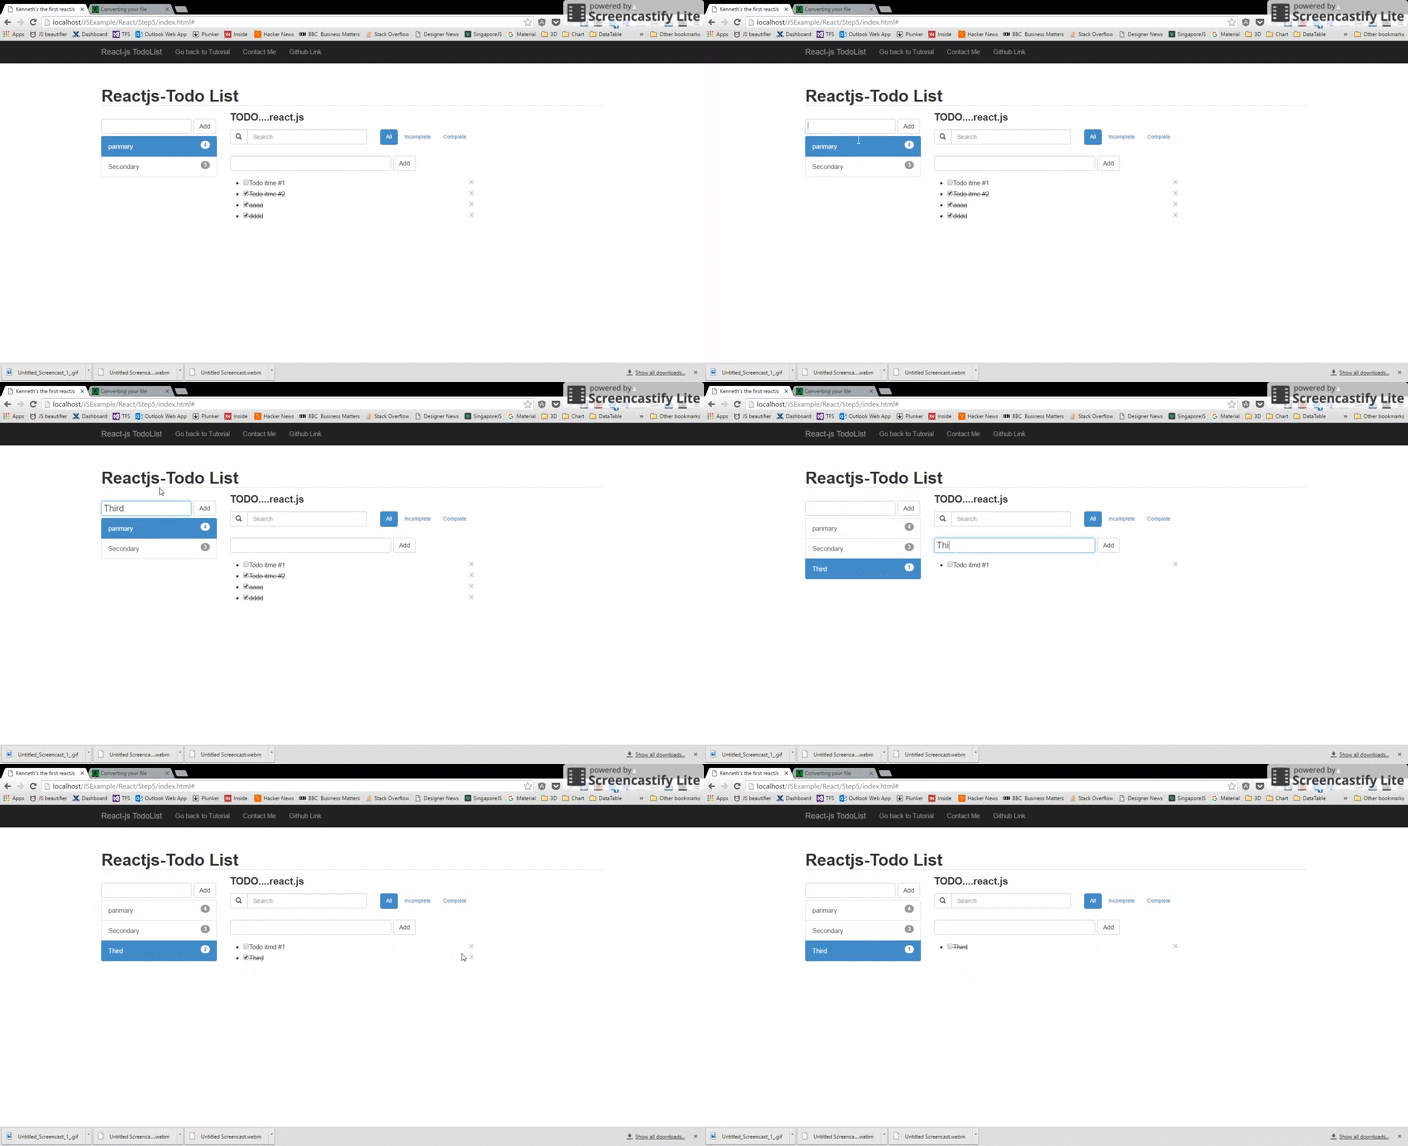
You should now have following screenshot
The complete working demo can be found here .
##Building a Todo app with React.js (1) - A simple todos list
##Building a Todo app with React.js (2) - Improve Component & Remove Component