Building a Todo app with React.js
Lets start.You can follow the steps from the github repo for this tutorial.

This is my first attempt with React-js to build a Todo App. React has gained massive traction as a JavaScript library for building user interfaces largely because it is built by Facebook. We’ll learn how.
In this article, we’ll build an extremely an app using Facebook’s react.js. If you are unfamiliar with this library, then I would strongly recommend reading the complete tutorial on building a Comment system using React.
Thinking in components
The fundamental way of building a React.js app is to break down your app into bunch of useful components and then work your way backwards to build them separately. Once the individual components are ready, we can wire them up to exchange data between the components. For instance, our Todo app can be decomposed into the following components and hierarchies,
- TODO APP
    - TODO BANNER
    - TODO FORM
    - TODO LIST
        - TODO LIST ITEM #1
        - TODO LIST ITEM #2
        ...
        - TODO LIST ITEM #n
Basic Skeleton
/* [TODO APP] */
var TodoApp = React.createClass({ ... });
    /* [TODO BANNER] && [TODO LIST] */
    var TodoBanner = React.createClass({ ... });
    /* [TODO FORM] */
    var TodoForm = React.createClass({ ... });
    var TodoList = React.createClass({ ... });
        /* [TODO LIST ITEM] */
        var TodoListItem = React.createClass({ ... });

React.render(<TodoApp/>, document.body);
Component 1 - TodoApp
This component will hold a list of todo items that will be shared by its child components in various forms. The initial state of items will be a blank list. The list will be updated as soon as a new item is added via the TodoForm component.
/* [TODO APP] */
var TodoApp = React.createClass({
    getInitialState: function(){
        return {items: []};
    },
    updateItems: function(newItem){
        var allItems = this.state.items.concat([newItem]);
        this.setState({items: allItems});
    },
    render: function(){
        return (
            <div>
                <TodoBanner/>
                <TodoForm onFormSubmit={this.updateItems}/>
                <TodoList items={this.state.items}/>
            </div>
        );
    }
});
Component 2 - TodoBanner
It simply contains a heading tag.
/* [TODO BANNER] */
var TodoBanner = React.createClass({
    render: function(){
        return (
        <h3>TODO....react.js</h3>
        );
    }
});
Component 3 - TodoList
It accepts a list of items and wraps each item around a TodoListItem component. The final result is then wrapped with <ul> tag.
/* [TODO LIST] */
var TodoList = React.createClass({
    render: function() {
    var createItem = function(itemText) {
        return (
            <TodoListItem>{itemText}</TodoListItem>
            );
        };
        return <ul>{this.props.items.map(createItem)}</ul>;
    }
});
Component 4 - TodoListItem
It wraps list elements with <li> so that it renders as a list block in the final HTML. this.props.children predictably contains all the descendents passed to the TodoListItem tag from its parent component.
/* [TODO LISTITEM] */
var TodoListItem = React.createClass({
    render: function(){
        return (
            <li data-id={this.props.value} key={this.props.value}>{this.props.children}</li>
        );
    }
});
Component 5 - TodoForm
It contains a text field followed by a button to trigger the addition of item in the Todo list. This component will hold the current item entered in the textfield and both of them are kept in sync using the onChange event. As soon as the submit button is pressed, the item is passed to its parent component and the focus is returned back to the textfield.
/* [TODO FORM] */
var TodoForm = React.createClass({
    getInitialState: function() {
        return {item: ''};
    },
    handleSubmit: function(e){
        e.preventDefault();
        this.props.onFormSubmit(this.state.item);
        this.setState({item: ''});
        ReactDOM.findDOMNode(this.refs.item).focus();
        return;
    },
    onChange: function(e){
        this.setState({
            item: e.target.value
        });
    },
    render: function(){
        return (
            <div className="row">
              <form  onSubmit={this.handleSubmit}>
                <div className="form-group col-sm-10">
                    <input type='text' className="todoField form-control"  ref='item' onChange={this.onChange} value={this.state.item}/>
                    <input type='submit' className="btn btn-default" style={{"float":"left","marginLeft":"5px"}} value='Add'/>
                </div>
              </form>
            </div>
        );
    }
});
Render - TodoApp
The last step is to render TodoApp
ReactDOM.render(
        <TodoApp/>,
        document.getElementById('todo')
      );
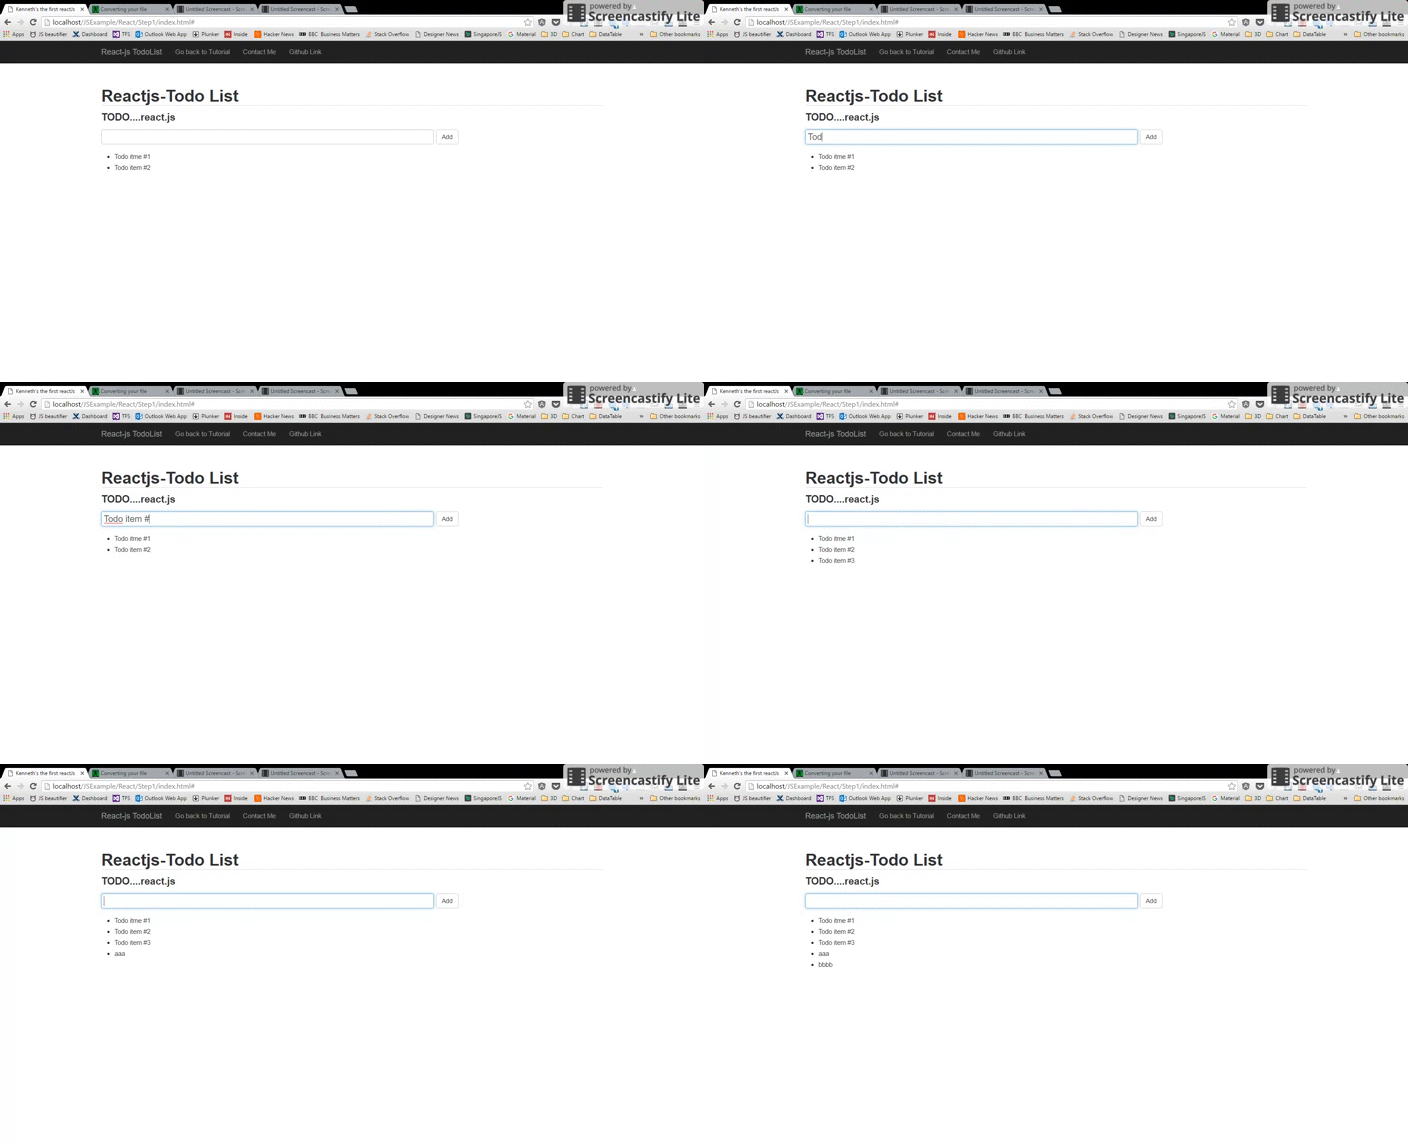
When you finish , you can see the TodoApp.
The complete working demo can be found here .
##Building a Todo app with React.js (1) - A simple todos list
##Building a Todo app with React.js (2) - Improve Component & Remove Component